You are here
Top Banner Images
Banner images are the large images located at the top of web pages. This is not to be confused with the Banner program a lot of teachers and students use on campus

Banner images should be cropped to a specific size before you upload them. If you don't, Drupal will try to resize it for you with very mixed results.
Banner images should be 1125 pixels by 280 pixels. 300 dpi looks best.
Banner images should be 1125 pixels by 280 pixels. 300 dpi looks best.
NOTE: If a banner image is added to your site home page, all other pages in your site are set to pull that image in. If you add more than one image to a page, the images automatically turn into a slide show and rotate. In order to keep your site mobile friendly, we suggest you limit your site to three or four banner images on a page.
UPLOADING:
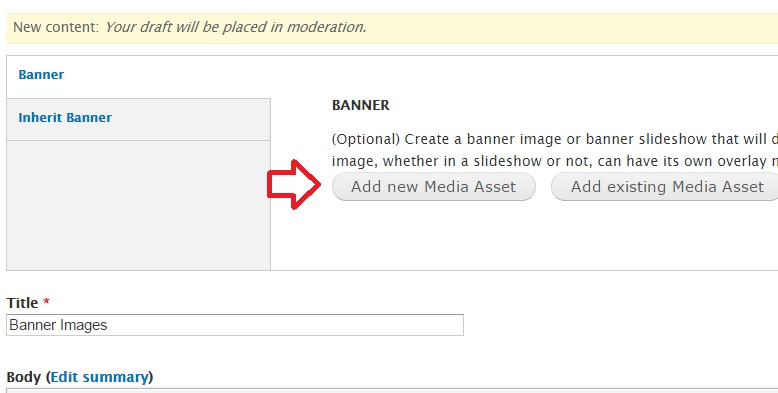
To add an image to a page, you must first start by creating a new draft of the page. The banner section is located at the top of your new draft. The link to upload a new image is called Add new Media Asset. If you want to reuse a banner image that has already been uploaded, you can use the Add existing Media Asset button.

To add an image to a page, you must first start by creating a new draft of the page. The banner section is located at the top of your new draft. The link to upload a new image is called Add new Media Asset. If you want to reuse a banner image that has already been uploaded, you can use the Add existing Media Asset button.

SELECT IMAGE From your computer. Follow the standard procedures for uploading an image to Drupal.


TITLE. One extra step not found in normal image upload is you have to do is provide a title for each banner image.


CREATE BUTTON. Once you have the banner uploaded, you need to select the Create Media Asset button each time you add a banner.


The final step is to publish your new draft in order for the new banner images to show on your page.
If you don't have the programs to edit images, feel free to contact me. If you need special images taken for your banner image, please contact ISU Photography in Communications and Marketing.
If you don't have the programs to edit images, feel free to contact me. If you need special images taken for your banner image, please contact ISU Photography in Communications and Marketing.
